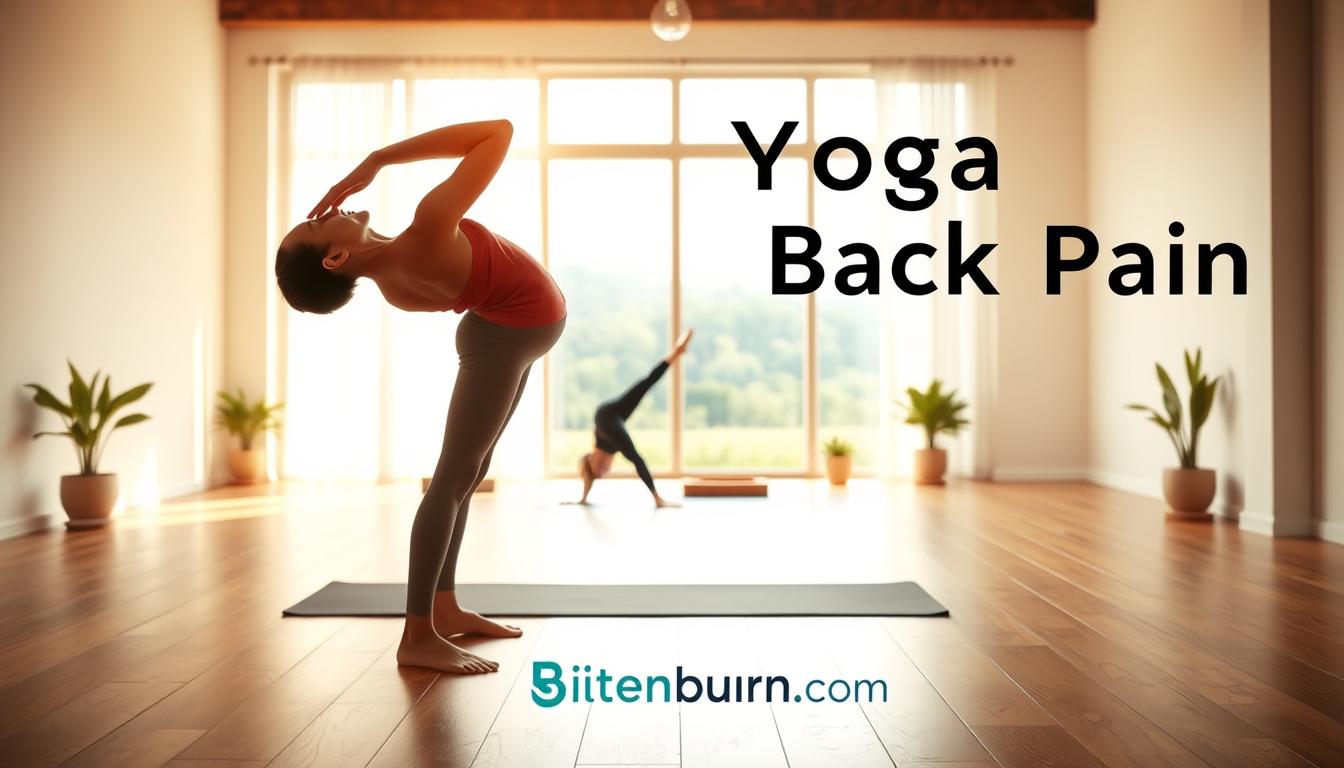
Did you know that nearly 80% of adults experience lower back pain at some point in their lives? If you’re dealing with this issue, you’re not alone. Yoga may be just what the doctor ordered. Practicing yoga stretches can help you gain more awareness of your body, relax, and strengthen your muscles.
By incorporating yoga poses into your daily routine, you can identify areas of tension and imbalance, bringing your body into balance and alignment. This can be particularly beneficial for those suffering from back pain. We will explore how these simple stretches can be performed safely at home, without special equipment, to help relieve current back pain and prevent future occurrences.
Key Takeaways
- Yoga stretches can be an effective solution for alleviating back pain.
- Consistent yoga practice helps identify areas of tension and imbalance.
- Simple yoga poses can be performed safely at home without equipment.
- These stretches can relieve current back pain and prevent future occurrences.
- Yoga strengthens core muscles and improves posture.
Preparing Your Body and Space for Yoga Stretches to Alleviate Back Pain at Home
Preparing your body and environment is crucial for a safe and effective yoga practice. To get the most out of your yoga stretches for back pain relief, you need to create a conducive environment and prepare your body.
Creating a Comfortable Practice Environment
To create a comfortable practice environment, start by choosing the right yoga mat that provides adequate grip and cushioning. Ensure you have enough space to move around without distractions or obstacles. Minimizing distractions is key to a focused practice. You can use props like blocks, straps, and blankets to make poses more accessible and effective for back pain relief.
When to Consult a Doctor Before Starting
Before starting any new exercise or yoga program, it’s essential to consult with your doctor, especially if you have any underlying medical conditions. Certain conditions, such as herniated discs or spinal stenosis, may require professional guidance. Your doctor can help identify potential risks and monitor your progress. Start with as little as 10 minutes per day and gradually increase your practice time as you become more comfortable.
- Consult your doctor if you have a history of back injuries or conditions.
- Begin with gentle stretches and gradually move to more complex poses.
- Listen to your body and modify poses based on your limitations and pain levels.
Cat-Cow Pose: Gentle Spine Mobilization
The Cat-Cow Pose is a gentle and accessible yoga stretch that mobilizes the spine and relieves back tension. This pose is particularly beneficial for improving flexibility in the spine while strengthening the supporting muscles of the back.
Muscles Worked and Benefits
Practicing the Cat-Cow pose engages multiple muscle groups, including the erector spinae, rectus abdominis, triceps, serratus anterior, and gluteus maximus. By stretching and mobilizing the spine, this pose helps to massage the spinal discs and improve circulation to the intervertebral tissues.
- Improves flexibility in the spine
- Strengthens the supporting muscles of the back
- Enhances posture and body awareness
Step-by-Step Instructions for Proper Form
To practice the Cat-Cow pose, start on all fours with your hands under your shoulders and knees under your hips. Balance your weight evenly between all four points. Inhale as you look up and let your stomach drop down toward the floor. Exhale as you tuck your chin into your chest, draw your navel toward your spine, and arch your back toward the ceiling. Continue this fluid movement for at least 1 minute, maintaining awareness of your body and releasing tension.
Downward-Facing Dog: Stretching the Entire Back

Downward-Facing Dog is a foundational yoga pose that stretches and strengthens the entire back. This traditional forward bend can be restful and rejuvenating, helping to relieve back pain and sciatica. By practicing Downward-Facing Dog, individuals can work out imbalances in the body and improve overall strength.
Muscles Worked and Benefits
The Downward-Facing Dog pose engages multiple muscle groups, including the hamstrings, deltoids, gluteus maximus, triceps, and quadriceps. Strengthening these muscles supports better back health by improving posture and reducing the risk of injury. Additionally, this pose helps to create length in the spine, decompress the vertebrae, and release tension in both the upper and lower back regions.
- Improves flexibility and strength
- Stretches the entire back and relieves tension
- Enhances overall body alignment
Step-by-Step Instructions for Proper Form
To practice Downward-Facing Dog, start by getting on all fours on the floor. Place your hands in alignment under your wrists and your knees under your hips. Press into your hands, tuck your toes under, and lift up your knees. Bring your sitting bones up toward the ceiling, keeping a slight bend in your knees and lengthening your spine and tailbone. Keep your heels slightly off the ground and distribute your weight evenly between both sides of your body, paying attention to the position of your hips and shoulders. Hold this pose for up to 1 minute, keeping your head in line with your upper arms or with your chin tucked in slightly.
Child’s Pose: Deep Relaxation for Your Spine
Relaxation and relief from back pain can be found in Child’s Pose, a gentle forward fold that stretches the entire back, hips, and legs. This pose is particularly beneficial for releasing tension in the neck and back, promoting a sense of calm and relaxation.
As we practice Child’s Pose, we allow our spine to lengthen and our body to relax, releasing any stored tension or stress. It’s an excellent counter-pose after more active stretches, allowing the back to integrate the benefits of previous movements.
Muscles Worked and Benefits
Child’s Pose engages several key muscle groups, including the gluteus maximus, rotator cuff muscles, hamstrings, and spinal extensors. By stretching these muscles, we can improve flexibility and reduce muscle tension, contributing to a healthier back.
The benefits of this pose extend beyond the physical, as the forward folding position stimulates the parasympathetic nervous system, reducing stress hormones that can contribute to muscle tension and back pain.
Step-by-Step Instructions for Proper Form
To practice Child’s Pose, start by sitting back on your heels with your knees together. You can use a bolster or blanket under your thighs, torso, or forehead for support if needed. Bend forward, walking your hands in front of you, and gently rest your forehead on the floor.
Keep your arms extended in front of you or bring them alongside your body with your palms facing up. Focus on releasing tension in your back as your upper body falls heavy into your knees. Remain in this pose for up to 5 minutes, breathing deeply and relaxing.
Cobra Pose: Strengthening the Back Muscles

The Cobra Pose is a gentle backbend that not only strengthens the spine but also soothes sciatica. Practicing this pose regularly can lead to improved posture and reduced back pain.
Muscles Worked and Benefits
Cobra Pose targets multiple muscle groups, including the erector spinae muscles along the spine, hamstrings, gluteus maximus, deltoids, triceps, and serratus anterior. Strengthening these muscles can improve posture, reduce back pain, and enhance overall spinal health.
Step-by-Step Instructions for Proper Form
To practice Cobra Pose, lie on your stomach with your hands under your shoulders and fingers facing forward. Press into your hands to slowly lift your head, chest, and shoulders. Maintain a slight bend in your elbows and engage your back muscles to support the movement. You can lift partway, halfway, or all the way up, depending on your comfort level.
Bridge Pose: Supporting Lower Back Health

One of the most effective yoga poses for supporting lower back health is Bridge Pose. This backbend and inversion can be both stimulating and restorative, offering numerous benefits for the spine and surrounding muscles. By practicing Bridge Pose regularly, we can strengthen our lower back, improve flexibility, and reduce the risk of back pain.
Muscles Worked and Benefits
Bridge Pose engages multiple muscle groups, including the rectus and transverse abdominis, gluteus muscles, erector spinae, and hamstrings. As we lift our hips towards the ceiling, we strengthen our lower back muscles and glutes, which can help alleviate lower back pain. This pose also promotes healing and reduces inflammation in the lower back by increasing blood flow to the spine and brain.
Step-by-Step Instructions for Proper Form
To practice Bridge Pose, start by lying on your back with your knees bent and heels drawn into your sitting bones. Rest your arms alongside your body, then press your feet and arms into the floor as you lift your tailbone up. Continue lifting until your thighs are parallel to the floor. You can interlace your fingers under your hips or place your hands under your hips for support. Hold this pose for up to 1 minute, then release by slowly rolling your spine back down to the floor, vertebra by vertebra. As you practice, focus on engaging your core and glutes to protect your lower back.
Extended Triangle Pose: Stretching the Spine and Hips

As a comprehensive standing pose, Extended Triangle Pose creates length in the spine while opening the hips and strengthening the legs. This foundational posture offers numerous benefits, including alleviating backache, sciatica, and neck pain.
Muscles Worked and Benefits
The Extended Triangle Pose engages multiple muscle groups, including the latissimus dorsi, internal oblique, gluteus maximus and medius, hamstrings, and quadriceps. By stretching the spine, hips, and groin, and strengthening the shoulders, chest, and legs, this pose may help relieve stress and anxiety, promoting overall well-being.
| Muscle Group | Action |
|---|---|
| Latissimus Dorsi | Stretched |
| Gluteus Maximus | Strengthened |
| Hamstrings | Stretched |
Step-by-Step Instructions for Proper Form
To practice Extended Triangle Pose, start by standing with your feet about 4 feet apart. Turn your right toes to face forward, and your left toes out at an angle. Lift your arms parallel to the floor with your palms facing down. Tilt forward and hinge at your right hip to come forward with your arm and torso. Bring your hand to your leg, a yoga block, or onto the floor. Extend your left arm up toward the ceiling. Look up, forward, or down, and hold this pose for up to 1 minute. Repeat on the opposite side.
Twisting Poses for Mid-Back Relief

Twisting movements are crucial for maintaining spinal health and reducing mid-back tension. These poses help massage internal organs while wringing out tension from the spine, improving overall back health and function. By incorporating twisting poses into your yoga routine, you can experience significant relief from mid-back pain.
Half Lord of the Fishes
The Half Lord of the Fishes pose is a seated twist that energizes the spine and helps relieve backache. It stretches the hips, shoulders, and neck, and can help alleviate fatigue and stimulate internal organs. To practice this pose, start by drawing your right foot into your body and bringing your left foot to the outside of your right leg. Lengthen your spine as you twist to the left, taking your left hand to the floor behind you for support. Move your right upper arm to the outside of your left thigh, or wrap your elbow around your left knee. Hold for up to 1 minute and repeat on the other side.
Two-Knee Spinal Twist
The Two-Knee Spinal Twist is a more restorative alternative that can be practiced by almost anyone, even those with significant back pain. This pose works the erector spinae, rectus abdominis, trapezius, and pectoralis major muscles, helping to release lower back tension. To practice, lie on your back and bring both knees into your chest. Gently twist your knees to one side while keeping your shoulders grounded. Take deep breaths, holding for several breaths before repeating on the other side.
Deep, mindful breathing during these twists enhances their effectiveness by allowing for a deeper release of muscle tension. As you practice these poses, focus on your breath to maximize the benefits for your back health.
Creating a Sustainable Yoga Practice for Long-Term Back Health
As we’ve explored various yoga poses for back pain relief, let’s discuss how to create a sustainable practice that maintains back health and prevents future pain.
To start, it’s essential to consult with your doctor before beginning any newyogaor exercise program, especially if you have underlying health conditions. They can help identify potential risks and monitor your progress.
Creating a balanced routine is crucial. This can be achieved by incorporating a mix of theyoga posescovered in this article, such asCat-Cow Pose,Downward-Facing Dog, andChild’s Pose. For example, you can create sequences for morning, evening, and quick relief during the workday.
Consistency is more important than intensity. Even 10-15 minutes of daily practice is more beneficial than longer sessions performed sporadically. As you progress, you can gradually increase the duration and intensity of your practice.
It’s vital to listen to your body and modify poses as needed. Yoga should never cause pain or discomfort. You can use online classes, books, or articles to guide your practice, and consider taking classes at a studio with instructors who cater to your specific needs.
To maintain motivation, set realistic goals and track your progress in terms of pain reduction and increased mobility. Additionally, incorporating complementary lifestyle practices such as proper ergonomics, regular movement, and stress management techniques can support back health.
By makingyogaa regular habit and part of a holistic approach to back health, you can effectively manage and prevent back pain. For more guidance on creating a personalized practice, consider consulting with a yoga therapist or healthcare provider.
[…] you know that nearly 80% of adults experience lower back pain at some point in their lives? It’s a debilitating condition that can significantly impact […]